Blog
The Complete Guide to How to Grow Magic Mushrooms: A Step-by-Step Cultivation Manual
The practice of cultivating psilocybin mushrooms, often referred to as “magic mushrooms,” has transitioned from a clandestine activity to a subject of open discussion and academic interest. With growing research into the therapeutic benefits of psilocybin, many individuals are seeking reliable information on how to grow magic mushrooms for personal use or study. Home cultivation offers a safe, year-round supply and eliminates the dangers associated with misidentifying wild fungi .
This guide serves as a comprehensive resource for beginners. It will walk you through the entire process, from understanding the biology of fungi to harvesting your own crop. We will cover the essential equipment, sterile techniques, and environmental controls needed for success. Furthermore, we will address common questions such as how long does it take to grow magic mushrooms, ensuring you have a realistic timeline for your project.
Understanding the Legal Landscape
Before delving into the practical steps, it is crucial to address the legal context. In many jurisdictions, while psilocybin spores are often legal to possess for microscopy purposes, the cultivation of psilocybin-containing mushrooms is illegal. This guide is provided for educational purposes only. It is your responsibility to understand and comply with the laws in your region. The focus here is on the mycological process, drawing from authoritative sources like “The Psilocybin Mushroom Bible” by Virginia Haze and Dr. K. Mandrake, a definitive text now in its second edition .
Chapter 1: The Foundations of Fungal Growth
To master how to grow your own magic mushrooms, one must first understand the basic life cycle of the fungus. The primary objective of cultivation is to guide the organism through its reproductive phases under controlled conditions.
1.1. The Life Cycle: From Spore to Mushroom
The journey begins with spores, which are analogous to plant seeds. When spores land on a nutritious surface (the substrate), they germinate. This germination produces thread-like cells called hyphae. When compatible hyphae meet and fuse, they form a interconnected web known as mycelium. The mycelium is the vegetative part of the fungus, a vast network that colonizes the substrate, breaking down nutrients to fuel growth. Under the right environmental conditions—specifically fresh air, light, and humidity—the mycelium will form primordia, also known as “pins.” These pins are the initial stage of the fruiting body, which will eventually develop into mature mushrooms. The mushroom’s sole purpose is to release a new generation of spores .
1.2. The Foundation of Success: Sterile Technique
The single most important factor in successful cultivation is sterilization. The nutrient-rich substrates used to grow mushrooms are also a magnet for competing organisms like mold and bacteria. Contamination is the primary reason for failure, especially for beginners. “Good practice, sterilization, and sterile technique” are not just recommendations; they are absolute requirements . This involves using a Still Air Box (a clear plastic tub with arm holes) or a flow hood to create a sterile work environment, and rigorously sterilizing all tools and materials.
Chapter 2: Choosing Your Cultivation Method
There are several proven ways to grow magic mushrooms at home. The choice depends on your budget, desired scale, and willingness to invest in equipment.
2.1. The PF Tek: The Gold Standard for Beginners
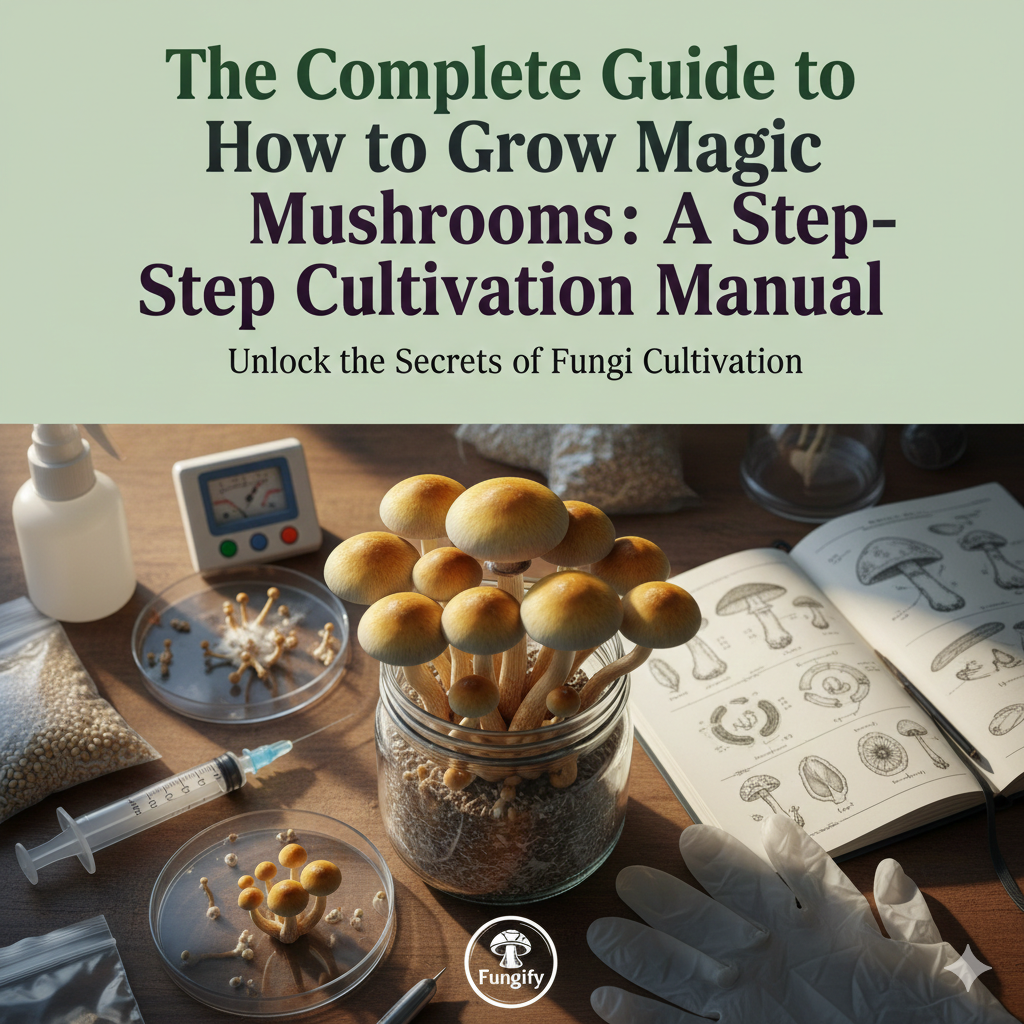
The PF Tek (Psilocybe Fanaticus Technique) is the most recommended method for first-time growers. It is simple, inexpensive, and requires no complex equipment . This method uses ½-pint wide-mouth jars as miniaturized growing environments.
- Jar Preparation: Sanitize the jars with alcohol and poke four holes in the lids for gas exchange. These holes are typically covered with a dry vermiculite layer or synthetic filter disks.
- The Substrate: The classic PF Tek substrate is a mix of vermiculite, brown rice flour, and water in a specific ratio (e.g., 2:2:5) . Vermiculite provides structure and water retention, while the rice flour serves as the nutrient source.
- Sterilization: The filled jars must be steam-sterilized. Place them in a pot with a few inches of water, bring to a boil, and steam for 60-90 minutes. This kills any contaminants present in the jars .
2.2. The All-in-One Grow Bag: The Easiest Start
For those looking for the simplest entry point, how to grow magic mushrooms in a bag is an attractive option. Pre-sterilized “all-in-one” grow bags are commercially available. These bags contain a blend of substrate, often including sterilized grain, coco coir, and vermiculite, along with a self-healing injection port and a breathable filter patch .
- Process: You simply wipe the injection port with alcohol, inject your spore solution (typically 2-3cc), and place the bag at room temperature .
- Simplicity: Once the grain is fully colonized, you break up the contents to mix the grain with the bulk substrate. When that is fully colonized, you open the bag to initiate fruiting. This method minimizes the need for jar preparation and works well for small-scale grows, yielding approximately 1.2 ounces of dried mushrooms per bag .
Chapter 3: The Step-by-Step Cultivation Process
This section provides a detailed timeline and instructions for the PF Tek, as it builds the foundational knowledge needed for all other methods. It will also answer the pressing question: how long to grow magic mushrooms?
3.1. Phase 1: Inoculation and Colonization (2-5 Weeks)
Inoculation is the process of introducing spores into the sterilized substrate.
- Procedure: Using your sterile technique, draw the spore solution into a sterile syringe. Heat the needle tip red-hot and allow it to cool to avoid killing the spores. Inject about 0.5cc to 1cc of spore solution through each hole in the jar lid, onto the inner glass wall so you can watch it run down.
- The Colonization Environment: Place the jars in a clean, dark, and warm area. The ideal temperature range is between 70-80°F (21-27°C) .
- What to Expect: Within a week, you should see white, thread-like growth—the mycelium—beginning to form on the rice flour . Over the next 2-4 weeks, this mycelium will spread throughout the jar, eventually turning the entire contents into a solid, white, cohesive mass. This is called a “cake” . If you see any colors other than white (green, black, pink, or orange), this indicates contamination, and the jar must be discarded immediately.
Timeline Answer: From spore inoculation to full colonization of the cakes takes approximately 3 to 5 weeks .
3.2. Phase 2: Preparing the Fruiting Chamber
While the jars are colonizing, you can build the fruiting chamber, which provides the high-humidity environment needed for mushrooms to form.
- The Container: Use a clear plastic storage tote. Drill ¼-inch holes all over the container—on the sides, lid, and bottom—spaced a few inches apart. These holes provide essential fresh air exchange .
- The Humidity Layer: Rinse perlite (a lightweight, volcanic glass) thoroughly to remove dust. Drain it well, then spread a 4-5 inch layer of the damp perlite in the bottom of the chamber. Perlite retains water and slowly releases it, maintaining high humidity .
3.3. Phase 3: Birthing and Fruiting (1-3 Weeks)
Once the jars are fully colonized, it’s time to move them to the fruiting chamber.
- Birthing the Cakes: Open the colonized jars and gently tap the cake out. You may need to use a clean spoon to coax it out.
- Rehydration (Dunking): For a robust first flush, the cakes need a long drink. Submerge each cake completely in cold, room-temperature water. Place a clean plate or weight on top to keep them submerged and let them soak for 24 hours . This step is crucial for telling the mycelium that it has reached the end of its water source and needs to fruit to reproduce.
- Rolling: After the soak, roll each cake in a bowl of dry vermiculite. This coating stays moist and provides a microclimate that encourages pin formation .
- Introducing to the Chamber: Place a piece of aluminum foil on top of the damp perlite for each cake. Set the cakes on the foil. The foil keeps them from sitting directly in the wet perlite, which could cause rot.
- Environmental Triggers: Fruiting is triggered by a drop in CO2, exposure to light, and high humidity.
- Light: The chamber should receive indirect natural daylight or ambient room light. Do not put it in direct sunlight .
- Fresh Air & Misting: This is the most active phase. You must open the chamber and fan the cakes with the lid for a few seconds to exchange air and lower CO2 levels. Following this, mist the inside walls of the chamber and the perlite 3-4 times daily . Aim to keep the walls beaded with moisture. Avoid spraying the cakes directly, as pooling water can lead to bacterial growth .
- Pin Formation: Within one to two weeks of being in the fruiting chamber, small bumps called “pins” will appear on the surface of the cakes. These will rapidly elongate into baby mushrooms.
3.4. Phase 4: Harvesting
The moment you’ve been waiting for arrives about two weeks after the start of the fruiting cycle .
- Timing is Everything: Harvest the mushrooms just before the veil breaks. The veil is the thin membrane connecting the edge of the cap to the stem. As the mushroom matures, this veil stretches and eventually tears. The peak of psilocybin content is right at this moment, just before the cap opens and spores drop .
- Technique: To harvest, gently grasp the base of the mushroom stem, twist it slightly left and right, and pull it upwards. This clean removal helps ensure that subsequent flushes (the next crop of mushrooms) can grow from the same site .
Final Timeline Answer: From the moment you inject the spores, the entire process until your first harvest takes approximately 4 to 8 weeks. A more specific breakdown is:
How long do magic mushrooms take to grow after birthing? Usually 10-20 days. How long does it take for magic mushrooms to grow from pins to maturity? Just a few days, often doubling in size daily.
Chapter 4: Harvesting, Second Flushes, and Preservation
Your work doesn’t end with the first harvest. With proper care, your cakes can produce multiple flushes.
4.1. Preparing for the Second Flush
After harvesting, you may notice small aborted mushrooms or remnants left behind. Clean the surface of the cake thoroughly, removing any old, dead mushroom tissue . Then, repeat the “dunking” process. Submerge the cake in fresh, cold water and place it in the refrigerator (at about 2-8°C) overnight for 12-24 hours. This “cold shock” mimics the end of a season and can stimulate another fruiting cycle . After the soak, return the cake to the fruiting chamber and resume misting and fanning. The second flush is often just as plentiful as the first.
4.2. Drying and Storage
Fresh mushrooms are mostly water and will rot within a few days if not used. For long-term storage, they must be dried thoroughly until they are “cracker-crisp”—snapping cleanly when bent.
- Drying Methods: The best method is to use a food dehydrator. Set it on a low setting (around 95-110°F / 35-43°C) and dry for several hours or overnight until crisp . If you don’t have a dehydrator, you can place them in a paper bag in front of a fan for a couple of days, but this is less reliable.
- Storage: Place the cracker-dry mushrooms in an airtight glass jar (like a Mason jar) with a desiccant pack (silica gel) to absorb any residual moisture. Store the jar in a cool, dark, dry place. Properly stored, they can retain their potency for 2-3 years or more .
Chapter 5: Troubleshooting and Best Practices
Even with careful technique, issues can arise. Understanding common problems is key to a successful grow.
5.1. Identifying and Preventing Contamination
Contamination is the enemy. Here are common signs and sources :
- Green Mold (Trichoderma): A bright green patch is the most common contaminant. It spreads quickly and is a death sentence for the cake. Discard immediately, preferably away from your grow area.
- Black Mold (Aspergillus): Black or dark green spots. Highly dangerous to human health. Discard immediately.
- Yellow or Pink Spots (Bacteria): Often indicates “wet spot” or “lipstick mold” bacteria. The mycelium may also excrete a yellow liquid (metabolites) to fight off mild bacterial infections. If the smell is sour or foul, the jar is lost.
- Cobweb Mold: A grey, wispy mold that grows rapidly over the surface, looking like fuzzy cobwebs.
Prevention is always better than cure. Scrupulous cleanliness, proper sterilization times, and using a Still Air Box for inoculation are the best defenses.
5.2. Optimizing Conditions
- Patience: The process is natural and cannot be rushed. “Patience is very important in the process of growing mushrooms” . If a kit or jar hasn’t shown growth in 3-4 weeks, it might be “sleeping.” A cold shock and rehydration can sometimes reset it .
- Temperature Control: Consistency is key. Avoid large temperature swings. If temperatures drop below 18°C, consider a heating mat, but ensure it doesn’t exceed 35°C .
- Water Quality: Always use clean, fresh, lukewarm water .
Conclusion: The Reward of Cultivation
Learning how to grow magic mushrooms is a journey into applied mycology. It requires patience, attention to detail, and respect for the natural processes at work. By following the sterile techniques and environmental controls outlined in authoritative guides like The Psilocybin Mushroom Bible and this comprehensive overview, even a complete novice can successfully cultivate a crop . From the first sign of mycelium to the final harvest, the process is not just a means to an end but a rewarding and educational experience in itself. Whether you are seeking a sustainable personal supply or simply the satisfaction of nurturing a life form from spore to fruit, the knowledge gained is invaluable. As with all powerful substances, respect for the mushroom and a commitment to safety and legality are paramount.


Thank you for the detailed guide on the product. I found it very helpful and easy to follow. I look forward to more articles like this!
This guide was so informative and well-written. Thank you for sharing these cultivation tips, can’t wait to try it out myself!
I appreciate the step-by-step approach in this guide. It makes the cultivation process seem less daunting. Thank you for the clear instructions!
This guide was exactly what I needed to start my own mushroom cultivation journey. The step-by-step instructions were clear and easy to follow. Thanks a lot!
I appreciate the effort put into creating this comprehensive cultivation manual. It’s a great resource for beginners like me. Looking forward to experimenting with growing magic mushrooms!
Great article, April! This guide does a fantastic job of breaking down the mushroom cultivation process into simple, easy-to-follow steps. I really appreciate how clearly you explained the preparation, growing conditions, and maintenance required for successful cultivation. Guides like this are extremely helpful for beginners who want to understand the process before getting started. Thanks for sharing such detailed and valuable information!
Excellent guide, April! I really liked how you explained the entire cultivation process step by step. The tips on maintaining the right environment and avoiding common mistakes are especially helpful for beginners. Articles like this make it much easier for people who are interested in learning about mushroom cultivation. Thanks for sharing such an informative and well-structured guide!